
Learning to cook chicken so it shreds easily is a skill every home chef should have. This knowledge helps you make your favorite dishes, like tacos, salads, or soups, even better.
Consistency is the secret to getting great results at home. Keeping the chicken moist and managing the heat are key. This guide will show you how to turn simple ingredients into a versatile dish.
Key Takeaways
- Select the right cuts, such as breasts or thighs, for optimal texture.
- Maintain low, consistent heat to break down muscle fibers effectively.
- Use liquid braising to keep the meat moist during the heating process.
- Allow the protein to rest before pulling it apart for better results.
- Utilize simple tools like two forks to achieve the perfect consistency.
Understanding the Science of Tender Shredded
To make tender shredded , you need to know about muscle fibers and heat. Cooking changes raw protein into a tasty meal. By understanding these changes, you can make juicy chicken that’s easy to shred.
Why Muscle Fibers Matter
Chicken has long, thin muscle fibers held by connective tissue. Heat makes these fibers contract and tighten. If cooked too fast or too hot, they become dry and hard.
To get the right texture, let the fibers relax. When cooked right, they release their grip. This makes the meat into the tender strands we love.
The Role of Collagen and ConnectiveTissue
Collagen is a tough protein that holds the muscle together. It softens when cooked slowly in moist heat. This turns it into gelatin, making the meat silky.
This change is key for tender meat. Without it, the meat would be tough and hard to chew. Proper moisture retention relies on this process.
Temperature Control for Optimal Texture
Controlling the heat is crucial. If it gets too hot, the proteins dry out and lose their juices. This makes the meat tough and hard to shred.
Use a steady, low heat to keep the meat tender. A consistent temperature ensures the collagen melts slowly. This balance is the secret to juicy every time.
Selecting the Best Cuts for Shredding
Choosing the right chicken cut is key to making perfect shredded chicken. The cut you pick affects the moisture and taste. Knowing the differences helps you pick the best chicken for shredding for your dish.
Benefits of Using Breast
breast is great for those who want a lean, mild-tasting proteinIts lean texture allows it to soak up seasonings and sauces effectively… Cooked right, it shreds beautifully for salads, wraps, or soups.
Why Thighs Provide More Moisture
Chicken thighs are better for tender, juicy meat. They feature greater levels of fat and connective tissue. This makes them forgiving during cooking. The fat melts, keeping the meat juicy, even when cooked a bit longer.
Balancing Lean and Fatty Cuts
Many chefs mix both cuts for the best flavor and texture. breast vs thighs shows mixing them gives a clean breast taste with the thigh’s moistness. This way, your shredded chicken is never too dry or greasy.
| Feature | Breast | Thighs |
|---|---|---|
| Fat Content | Low | High |
| Flavor Profile | Mild | Rich |
| Texture | Firm | Tender |
| Best Use | Salads & Wraps | Tacos & Stews |
How to Use the Stovetop Method
Learning how to cook to shred on the stovetop lets you control the texture. This method uses gentle heat to break down fibers without drying them. Keeping the chicken submerged ensures it stays moist and easy to shred.
Preparing Your Poaching Liquid
A well-seasoned poaching liquid is the key to delicious meat. Fill a deep pot with water or low-sodium chicken broth to cover the chicken. Adding aromatics like garlic, onion, bay leaves, and peppercorns adds flavor.
When poaching chicken, avoid high heat. It can make the proteins tighten too soon. Instead, bring the liquid to a light boil, then lower the heat to the lowest setting. This helps the meat cook evenly.
Maintaining a Gentle Simmer
For the perfect texture, keep the simmer slow. Aim for a few small bubbles at the surface. If it boils too hard, the chicken will be tough.
Keep the pot partially covered to control the temperature. This prevents the liquid from evaporating too fast. Monitoring the pot every few minutes keeps the temperature right.
Testing for Doneness
Knowing when to stop cooking is crucial. Use a digital meat thermometer to check the chicken’s thickest part. Look for an internal temperature of 165°F for safety and tenderness.
If you don’t have a thermometer, check with a fork. If the fibers pull apart easily, it’s ready. Remove it from the liquid right away to avoid overcooking.
Utilizing a Slow Cooker for Effortless Shredding
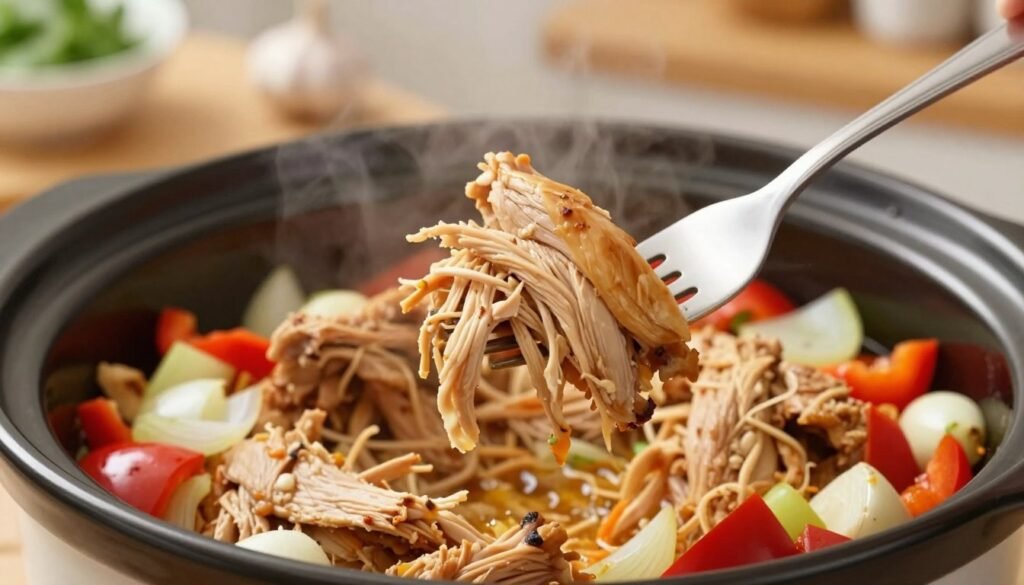
Turning raw into tender, easy-to-pull strands is simple with a slow cooker. It’s perfect for those who are busy but want tender results with little effort. The slow cooker’s gentle heat makes easy shredded that’s great for many dishes.
Setting the Right Temperature
The majority of slow cookers offer Low and High cooking options. . For the best results, choose low and slow. This method breaks down the meat’s connective tissues, making it softer.
For the most flavorful and tender results, let your slow cooker do its job without rushing the process.
Adding Aromatics and Liquids
To make your slow cooker more flavorful, start with a flavorful base. Add aromatics to create a fragrant environment. Here are some ingredients to consider:
- Fresh garlic cloves or smashed ginger
- Sliced onions or shallots
- Dried herbs like oregano, thyme, or bay leaves
- A splash of chicken broth or citrus juice to keep it moist
Managing Cooking Time for Maximum Tenderness
Timing is key to avoid dry or stringy meat. Boneless, skinless breasts cook in 3 to 4 hours on low. Thighs take 5 to 6 hours. Always check the meat’s internal temperature for safety.
When the meat is tender, it should easily pull apart. If it’s still firm, add a bit of liquid and cook for another 30 minutes. Following these steps ensures your slow cooker stays juicy and flavorful.
Pressure Cooking Techniques for Quick Results
If you’re in a hurry, pressure cooking is the fastest way to get tender chicken. It uses high-pressure steam to quickly break down meat. This makes the chicken easy to shred, just like in a restaurant, but much faster than traditional cooking.
Using an Instant Pot for Perfect Texture
The Instant Pot is a favorite in many kitchens for its reliable results. Place your chicken pieces in a single layer at the bottom of the pot. This helps the heat spread evenly and prevents the meat from sticking together.
Consistency is key when using an electric pressure cooker. Uniform chicken pieces ensure even cooking. This prevents some parts from getting mushy while others stay tough.
Calculating Liquid Ratios
Getting the right amount of liquid is crucial for safe pressure building and keeping your pressure cooker chicken moist. Most models need at least one cup of thin liquid, like chicken broth or water, to create steam. Too little liquid can cause a burn warning or prevent pressure buildup.
Don’t add too much liquid, as it can water down your seasonings. Cover about one-third of the meat with liquid. This amount provides enough steam to tenderize the meat without losing its juices.
Natural Release Versus Quick Release
The method you choose to release pressure affects the meat’s texture. A natural release, where you let the pressure drop on its own, is best for poultry. It helps the meat stay juicy by relaxing the muscle fibers.
A quick release, where you manually vent the steam, is faster but can make the chicken dry. For the most tender pressure cooker chicken, always choose a natural release if you can.
Oven Roasting Methods for Flavorful Shredded
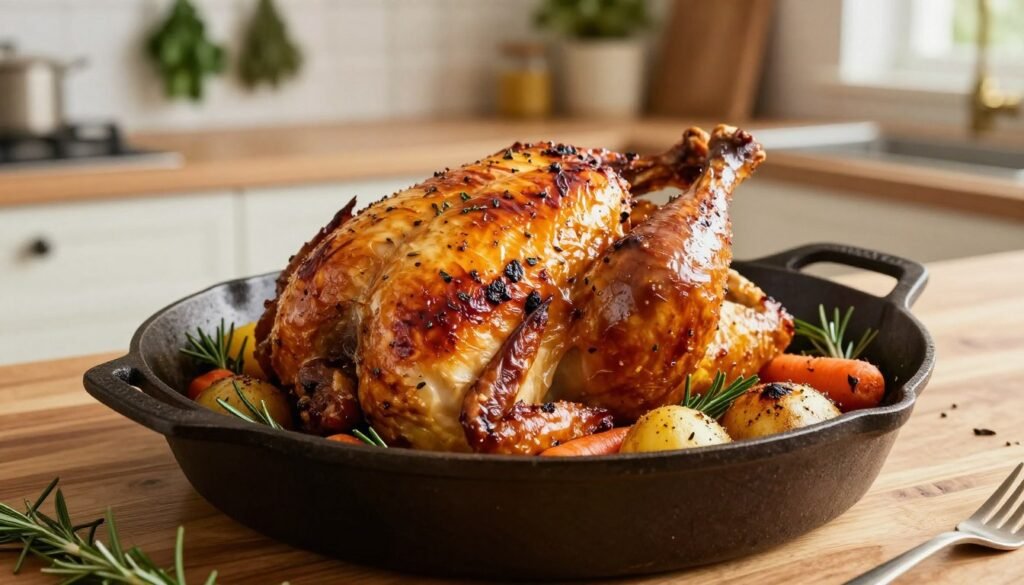
Oven roasting brings out deep, savory flavors that other methods can’t match. Unlike poaching, the oven’s dry heat caramelizes natural sugars. This makes your oven roasted richer, perfect for tacos, salads, or casseroles.
Braising in the Oven
Braising combines dry heat with moist liquid for tender meat. Place in a Dutch oven with broth or wine. This method keeps the meat juicy and flavorful.
Using Foil Packets to Retain Moisture
Foil packets are great for easy cleanup. They trap steam for incredibly succulent chicken. Add herbs, garlic, and citrus to the packet for extra flavor.
Resting the Meat Before Shredding
Let the chicken rest for at least ten minutes after cooking. . The juices redistribute, keeping the meat moist when you shred it.
| Method | Flavor Profile | Moisture Level | Best Use |
|---|---|---|---|
| Dutch Oven Braise | Deep & Complex | High | Large Batches |
| Foil Packet | Bright & Infused | Very High | Quick Meals |
| Open Roasting | Caramelized | Moderate | Crispy Skin |
Essential Tools for Shredding Efficiently
After cooking your meat perfectly, picking the right tools makes prep work quick and easy. The right shredding tools can turn a hard task into a breeze. Whether you like big chunks or small strands, your tool choice affects your dish’s texture.
Using Two Forks for Manual Shredding
Using two dinner forks is a classic way to shred meat. This method gives you control over the size of your pieces. It’s great for those who want a rustic, hand-pulled look in their dishes.
- Hold one fork in each hand with the tines facing inward.
- Insert the tines into the meat and pull in opposite directions.
- Repeat this motion until you reach your desired consistency.
The Stand Mixer Technique
A stand mixer is a lifesaver for big batches of easy shredded . It saves time and effort, especially for large amounts of meat. Just put the warm chicken in the bowl and use the paddle on a low setting.
Watch the meat as it turns into uniform strands quickly. Don’t over-mix, or it will become paste. This method is ideal for big meals or family gatherings.
Handheld Electric Mixer Tips
A handheld electric mixer is a good middle ground. It’s great for smaller amounts and is easy to move around. To avoid splashing, keep the beaters in the meat.
Start slow to control the texture. If the meat gets too cold, reheat it or add warm broth. Using these shredding tools right keeps your easy shredded chicken moist and tasty every time.
Common Mistakes That Lead to Dry or Tough
Small mistakes during cooking or cooling can ruin your dish. Even with top ingredients, wrong techniques can mess up the texture. Knowing these common errors helps you avoid dry and get tender, juicy results every time.
Overcooking the Meat
Leaving meat on heat too long makes it tough. When it hits 165°F, the fibers tighten and lose moisture. Always use a digital meat thermometer to take it off heat right at 165°F.
Shredding While Too Hot or Too Cold
Shredding at the right time is key. Shredding hot meat quickly dries it out. Waiting too long makes shredding hard and uneven.
Failing to Use Enough Liquid
Moisture keeps meat tender during cooking. Not enough liquid makes chicken dry. Make sure the meat is mostly covered to avoid dry chicken.
| Common Error | Resulting Texture | Best Solution |
|---|---|---|
| Excessive Heat | Stringy and tough | Use a meat thermometer |
| Immediate Shredding | Rapid moisture loss | Rest for 10 minutes |
| Insufficient Liquid | Dry and chalky | Add extra broth or stock |
By making these simple changes, . Keep an eye on temperature and liquid levels for a better meal.
Flavor Infusion and Seasoning Strategies
Once your chicken is cooked, the real magic begins. This is when you add flavor to the shredded chicken. It’s the final step to make every bite full of taste.
Seasoning the Cooking Liquid
Flavor infusion starts before you shred the chicken. Adding aromatics to your cooking liquid lets the chicken soak up flavors from the inside.
- Use vegetable stock instead of plain water.
- Add whole garlic cloves, onion wedges, and fresh herbs like thyme or rosemary.
- Include a splash of soy sauce or a pinch of peppercorns for a subtle boost.
Adding Sauces After Shredding
After shredding, you have a canvas for shredded chicken recipes. Adding sauces now lets you tailor the flavor to your liking.
For the best taste, mix the warm chicken with your chosen sauce right away. This helps the chicken stay moist and flavorful. Whether you like tangy barbecue, spicy buffalo, or a zesty lime and cilantro vinaigrette, consistency is key for a great taste.
Storing Shredded Chicken to Maintain Moisture
Storing chicken properly is as crucial as seasoning it. To keep it juicy, store it with a bit of its cooking liquid or a light sauce.
Put the meat in an airtight container to prevent drying out. If freezing, use freezer-safe bags and remove air. Taking these extra steps will keep your chicken tender and flavorful for later use.
Conclusion
Learning to make tender shredded chicken changes how you cook every week. You now know how to keep it moist and flavorful, no matter the cooking method.
Being consistent is crucial in cooking. By controlling the temperature and choosing the right cuts, you ensure every dish is perfect. This skill makes meal prep easier and faster.
Preparing ingredients ahead of time makes your kitchen more efficient. These tips help you save time on busy nights. Try new spices and herbs to keep your meals exciting.
Share your favorite chicken recipes with friends and family who love cooking. Your delicious protein will impress everyone. Start making more chicken today for easy, tasty meals.